Thursday, November 22, 2012

Guardian Service Roast Turkey and Gravy


Happy Thanksgiving! Here is our annual post on the Guardian Service stove-top method for roast turkey and my own family's gravy recipe, adapted for Guardian Service Ware. A Happy Thanksgiving from our family to yours—in Good Health, Pleasure and Profit!
Carving the roast turkey, prepared stove-top with the Guardian Service Roaster.

Guardian Roast Turkey

1) Prepare the turkey (bring to room temperature, remove the neck and giblets from the cavity and rinse thoroughly, pat dry and salt the bird, inside and out). Lather with butter, stuff and truss. In a medium pan (we used the 2 qt dome cooker), roast the neck and giblets over a layer of celery and garlic for an hour, then add water and continue to simmer on low until you're ready to add it to the stuffing and/or gravy (see below).

2) Over a medium burner, heat 2 Tbsp. fat and 2 Tbsp. butter in roaster and coat pan well. Place turkey in roaster and sear, browning all surfaces of the bird, 90 seconds per plane so that the skin caramelizes. (This keeps the juices inside the turkey as it cooks). Be bold! We used two large spatulas, rolled the bird in the pan, and grabbed it with a clean towel. Properly trussing the bird can take some handling. Remove turkey from pan; pouring off and reserving excess fat. Place turkey on its breast on roaster rack and lower into roaster. Cover with lid and cook over both burners at low heat for 15-20 min/lb.

3) Halfway through the roasting period, flip the bird—that is, turn it to  distribute the juices. Remove the roaster lid and invert it as a resting tray, then remove the rack from the roaster and place turkey in the lid. Turn the turkey on its back, reposition on the rack and return it to the roaster to continue cooking. 

4) The turkey is done when its juices run clear, the wings give and the thigh meat reaches 165℉. Now comes the fun part, finishing by browning the turkey using the deflected heat of the Guardian Service stove-top browning technique. Set roaster to one side of stove, remove lid and position it so it channels the heat over the turkey. Now you are a knight using his shield to roast his catch over an open fire! Turn it any way you please, letting each side of the turkey get a good toasting. Meanwhile baste well to give a healthy brown glaze. 

The Lee-Peterson-Robinson Gravy

My mother's family's method for making gravy is a long-held tradition passed down through my great grandmother Ruth Lee Peterson, as Yankee a Puritan as they came. The method is simple, but requires patience and diligence, for which you'll be rewarded with unparalleled flavor.

1) Over medium heat, reduce the roaster pan drippings until they caramelize and stick. NOTE: It can take 30-40 minutes for the sugar in the drippings to properly caramelize and the fat to separate and run clear. During this window it is crucial that you ignore your nagging doubt and the hand-wringing of loved-ones who think you're burning the gravy and wondering why dinner is getting cold and why you're ruining this festive occasion... Patience—and DON'T SCRAPE the bottom of the pan.

2) When the fat separates from the browned turkey drippings, pour off all but a Tbsp or two of the excess fat and return the roaster to a low heat. NOTE: Because the Guardian Service pan heats evenly, it's harder to get drippings to really hold to the bottom of the pan*. (We used a free-range bird which has very little fat—just enough for the following step, the roux—but if you're cooking a Butterball, you may need a gravy separator for this step).

3) Whisk 2-3 Tbsp. of flour into the giblet stock and add gradually to the roaster, de–glazing the pan and blending continuously until smooth and thick. Salt and pepper to taste and serve. (Note: You can also use leftover water from boiling potatoes (or  pasta) to de-glaze the pan, in which case there's no need for the extra flour—but if you're using the "waterless method" to cook your potatoes, you may not have any starchy water handy!).

Optional: for a heartier gravy, use a blender to incorporate the roasted neck and giblet meat (first removing meat from the neck bones) into some of the giblet stock and add to gravy as well.

*Don't fear a clean-up nightmare—the even heating of the Guardian Service cookware means an easier clean up than cheaper enamel pans which are more likely to scorch.

Thursday, June 14, 2012

Grilled Artichokes in Guardian Service Cookware


Most Guardian Service Cookware recipes require a low, sustained heat to slowly "pressure cook" foods—a technique perfectly suited to any variety of seasonal heat sources from campfire to propane grill to charcoal hibachi. 
In our case, we use a small hibachi we've had for over a decade and a spare trivet (designed to support the Guardian Service Economy Trio Cookers, or heart-shaped "triangle" pans) to keep the cookware from charring on the grill. With attention to timing and order, we've rotated main and sides dishes to cook an entire meal over two dozen briquettes.

We've used the Casserole/Tureen to steam artichokes before, but this method steams, then finishes the artichokes on the grill for added flavor.

Grilled Artichokes

4 large artichokes (globe or any variety, trimmed, halved)
2 lemons
4 cloves garlic, minced
1 cup olive oil
salt, pepper to taste
1/4 cup water (or stock or dry vermouth, optional)
  1. Fill a large bowl with cold water and juice of half a lemon. Trim the tops of the artichokes, a few of the outside leaves and end of the stem and slice in half lengthwise. Place halves in the lemon water to prevent from browning.
  2. Place artichokes, half a juiced lemon, 1/4 cup water in Guardian Service Tureen unit, lid and place over medium heat for 30 minutes or until tender.
  3. Add mixture of olive oil, remaining lemon juice, garlic and salt and pepper to the artichokes. Coat with marinade mixture, brushing the sliced halves.
  4. Place artichokes on the preheated grill. Baste and turn for 5-10 minutes until tips are lightly charred. Serve with remaining lemon-olive oil dip.
Options: before cooking, tuck into each artichoke crushed bay leaf, basil, parsley, chives, etc.


Thursday, May 3, 2012

Lucy and Desi Love Guardian Service Ware

Lucille Ball and Desi Arnaz argue over the Guardian Service Casserole/Tureen
In "The Long, Long Trailer" (1954), M-G-M Studios showcased the bounty of post-war America in cross-promotional arrangements with several manufacturers. Lucille Ball and Desi Arnaz play newlyweds who travel through the National Parks in a new travel trailer, outfitted from stem to stern with every modern convenience, including the finest in home cookware: Guardian Service Ware.  As "Tacy" (Ball) states, "You know, you just can't set up housekeeping and expect to rough it."


Friday, April 27, 2012

Cooking Pizza with Guardian Service Cookware

Homemade pizza is easy, economical and nutritious (hallmarks of the Guardian Service Cookware marketing mantra, "good health, pleasure and profit"). Although, as I mention in our original post on pizza, the creators and makers of Guardian Service Ware couldn't have imagined the 15" service tray being used for "pizza," a modern staple, which was only gaining popular appeal in America in the mid-fifties, by which time the company had ceased production.

We've cooked many pizzas on our Guardian Service tray (the round, flat, service tray works ideally for thin to medium crust pizzas and the "hammer" finish creates little pockets of air that aid in the crisping of the crust). But Mark Bitmann's recent post on pizza dough inspired us to further employ the Guardian Service griddle as a pizza stone. Placed upside–down on the center rack of the oven, the thick aluminum plate retains additional heat, creating an extra crispy crust.

And then this week, members of a Guardian Service fan group posted that they use the octagonal griddle itself to cook the pizza, which sounds ideal for a deep-dish pizza pie. (We'll experiment and report back with an update).

Pictured: Walnut pesto, caramelized onion and sausage pizza with mozzarella, on a whole wheat and cornmeal crust (see pizza dough recipe and instructions).

Join the conversation on the Guardian Service Facebook page.


Wednesday, March 14, 2012

Pork Barbecue (or "Pulled Pork," North Carolina style)


If you own Guardian Service Cookware, you have at your fingertips everything you need to explore the ancient cooking method of barbarcoa or barbecue, slow-cooking meat until it falls off the bone. Regional barbecue recipes have spurred competitions and festivals worldwide, but this pork barbecue recipe is a favorite of Andrew's family (a gift from Harold Hutchins, a family friend and native of North Carolina). We've further adapted the recipe for Guardian Service Cookware.
In Western North Carolina, "barbecue" refers to pork shoulder, typically slow-cooked in foil over coals. The Guardian Service method, slow-roasting on low radiant heat until the meat is soft enough to pull from the bones, beautifully simulates coal-roasting. After roasting and pulling, the shredded meat is added to the prepared sauce and simmered further.
The original recipe is classic Depression Era cooking—turning a difficult, muscular cut of darker meat into a delectable meal. This recipe transforms a cheap cut with a few supermarket items (8 oz. of "Catalina" Russian salad dressing and ketchup, a package of onion soup mix, vinegar, worcestershire, tabasco and apricot jam).
We took it as a challenge to use fewer prepared foods containing multiple (or mystery) ingredients. All the sauce ingredients up to the apricot jam replace the aforementioned dressing and soup mix. We've also added spring herbs, garlic and onions to infuse the meat during the roasting process. (Note that the original recipe also calls for the roast to be wrapped in foil, a technique we'll experiment with and post again about here).

Guardian Service Pork Barbecue
(or "Pulled Pork," Western North Carolina style)
Barbecue Sauce
2/3 cup tomato paste
1/3 cup apple cider vinegar
1 tsp dry mustard (i.e., Colman's)
1 tsp cinnamon
1 tsp ginger
1 tsp cumin
2 Tbsp blackstrap molasses
1 Tbsp honey
1/3 cup brown sugar
2 Tbsp dried minced onion
1/2 cup apricot preserves
1 Tbsp Worcestershire sauce
2/3 cup ketchup
additional vinegar, pepper sauce, smoked salt to taste

Pork Roast
1 large pork shoulder roast, trimmed
4 cloves garlic, sliced into slivers
1 sprig bay leaves
2 sprigs rosemary
1 onion, chopped
5-6 spring onions
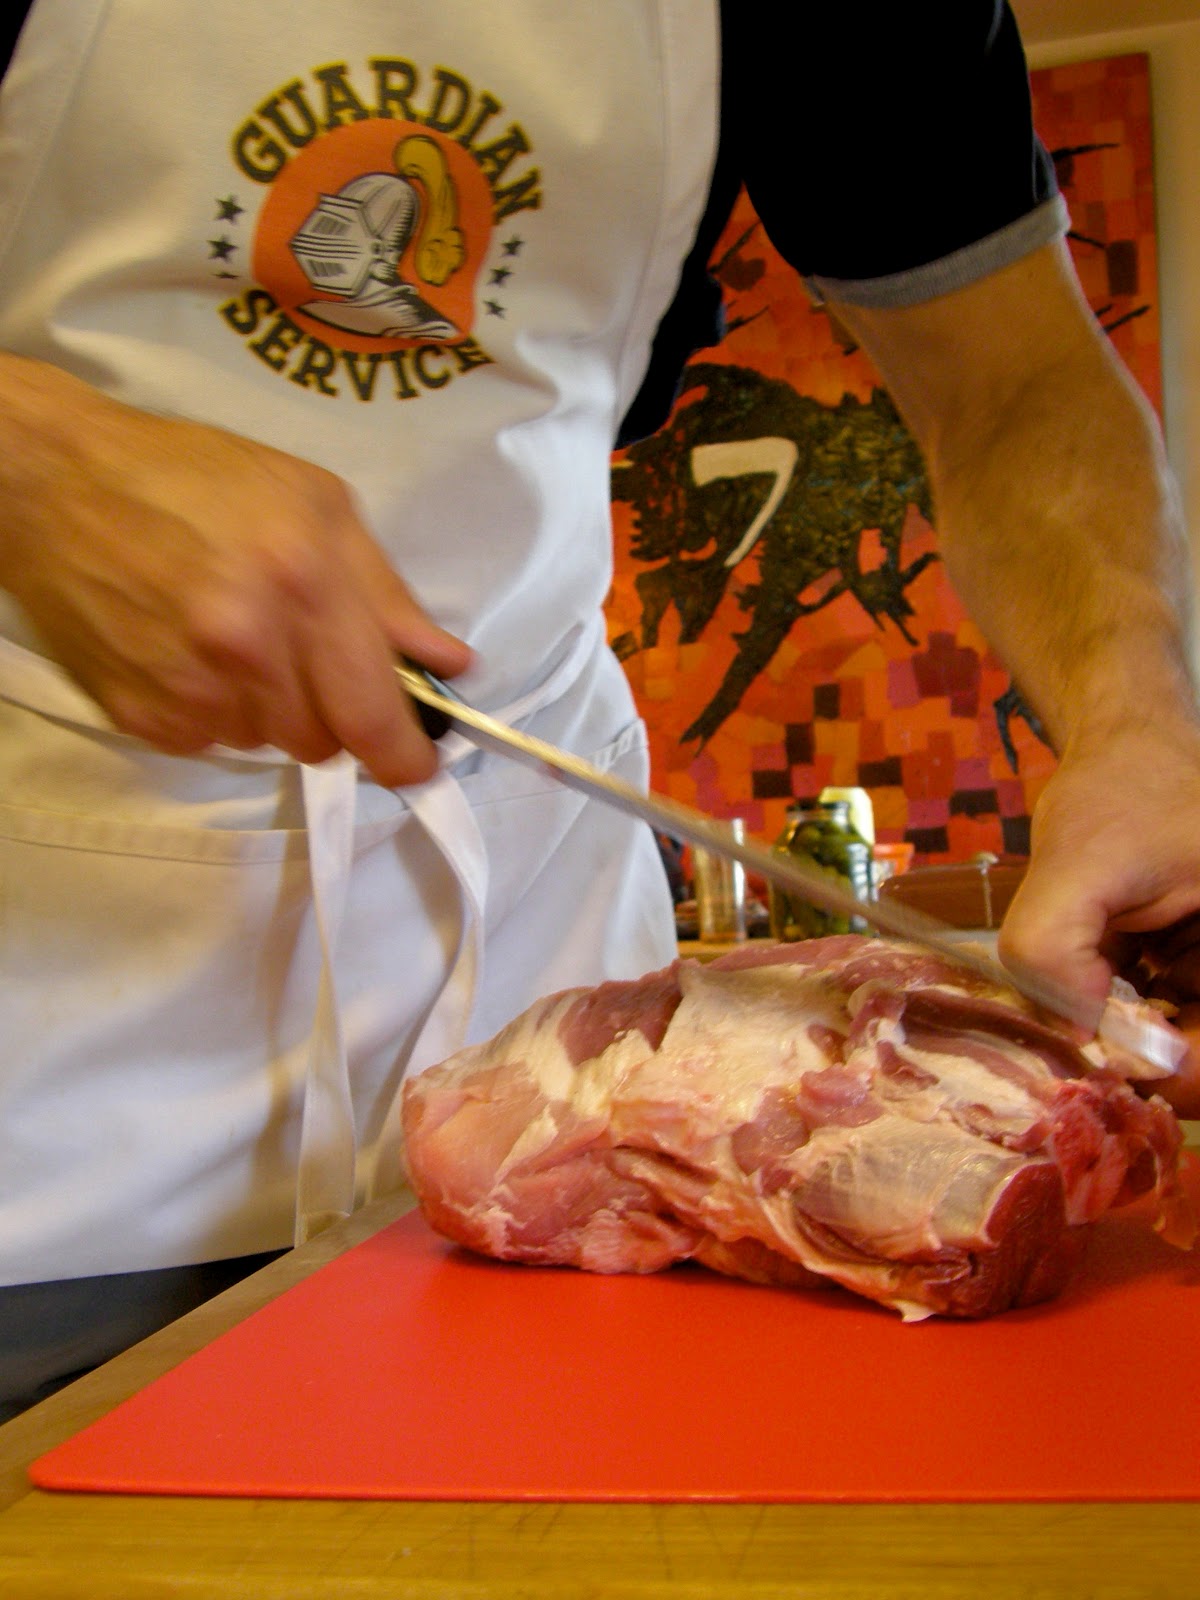
Trimming shoulder roast of exterior fat.
The roast, studded with garlic slivers and herbs, bedded in spring onions.

Apricot jam added to the barbecue sauce in the Guardian Service Dome Cooker.

Pulling the pork.

  1. Trim a large pork shoulder roast of its exterior fat and stud with garlic (use a paring knife to insert slivers of garlic).
  2. Line the base of the Guardian Service Roaster with chopped onion and spring onions. Position the prepared roast on the onion bed, cover and cook over LOW heat for 3 hours or more, checking on the hour, until it relaxes from the bone. NOTE: It's extremely important to keep the heat LOW. Turn the heat off at intervals over the course of cooking time (roughly half the time) or, if needed, vent the cover at an angle to keep too much heat from building up within the roaster.
  3. Meanwhile, in a large Guardian Service unit (pictured above, the 4 qt. straight-sided Guardian Service Dome Cooker) combine sauce ingredients and simmer over low heat until flavors marry (15 minutes). (Additional juice from the pork will further thin the sauce after incorporation).
  4. When roast is tender, cool and remove meat from the bone, discarding the fat and gristle. Notes Kathi Martin, "This is messy and tiresome, so be prepared… and get over it."
  5. Add meat to the simmering sauce and continue to cook over low heat until ready to serve (with coleslaw, by tradition!). 

Also: freezes exceptionally well, make extra or ahead to "get the mess over with at once with a summer's worth of BBQ."